
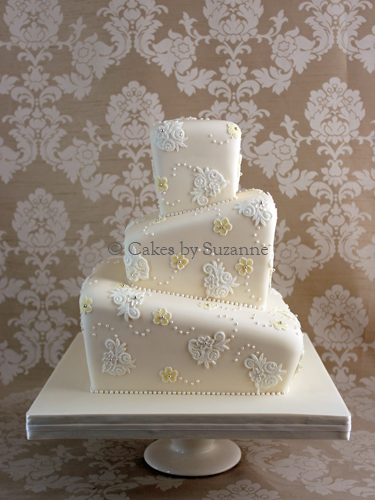
   I like to do a minimum of 3 tiers as I feel it looks more balanced. The ‘wonky’ part is actually a bit of an illusion – the lower tiers are carved so that the upper ones sit level as I have found this the most stable way to construct the cake – especially if it needs to be transported a considerable distance. The diagrams and images show a square cake but the same principle and method applies to a round. You will need: 4”, 7” and 10” sponge cakes, each baked in two halves with each half levelled to 2” deep – or you could bake 4” deep rich fruit cakes instead buttercream or ganache sufficient to fill the required cakes 3” square cake card 4” square cake card 6” square hardboard 7” square hardboard or drum 8” square hardboard or drum 14” square cake drum approx 3.5 kg chocolate paste or almond paste approx 4 kg sugarpaste spare cake drums covered with silicone paper to place the cakes on Carving the bottom tier (10”) Take your two 2” deep cakes and cut one exactly in half, giving 2 x 1” deep cakes. Cut the other layer at an angle, starting at the top left-hand side and cutting down to about half-way at the right-hand side, as shown by the black lines below. 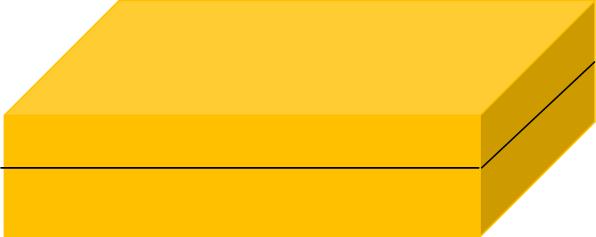 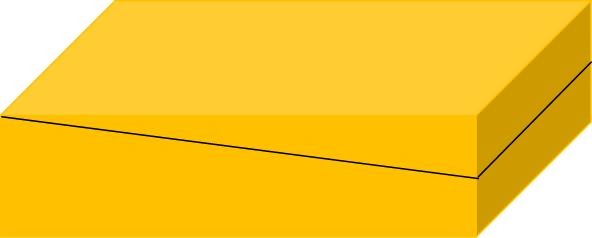 Stack the cakes together on a spare board covered with silicone paper, filling each layer with buttercream/ganache starting with the two straight layers at the bottom followed by the deeper (lower) wedge then rotate the top wedge 180 degrees so both deep sides are together giving you a cake looking something like this from the front: 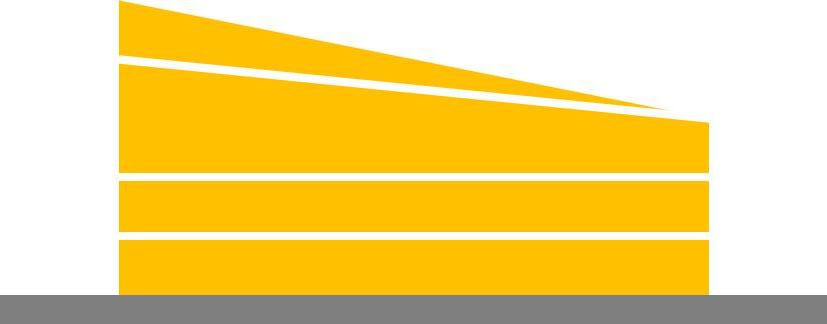 At this stage, it is a good idea to leave the cake overnight to settle if you can as it makes it easier to carve the sides. Wrap the cake tightly in two layers of cling film to keep it fresh. To carve the sides, use another spare board to help turn the cake upside down – place the spare board on top of the cake then flip it over, holding both the top and bottom boards carefully in place to support the cake between them. You can then remove the board which is now on top and either leave the cake sitting on the other board or slide it off the board onto a work surface. Place the 8” board centrally on top of the cake as a guide for carving the sides then carve each side down at an angle from the edge of the board, following the dotted line as shown to the outside edge of the cake. 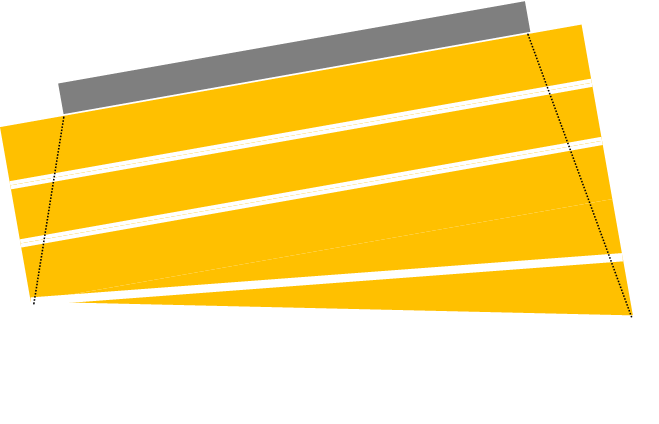 Remove the 8” board and place the 14” drum on top of the cake then invert to the correct way up - you should end up with a cake looking something like this: 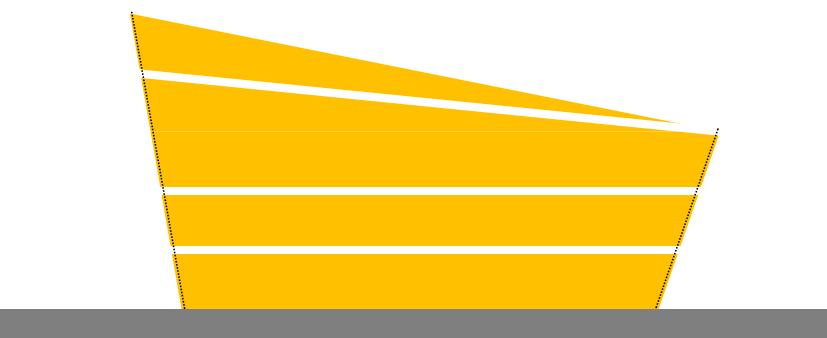 You then need to carve a piece out of the top slope of the cake to enable the next tier up to sit level. Use your 7” board as a guide as this is 1” bigger than the bottom of the cake that will sit in the hole. Cutting a hole 1” larger than you need allows room for a coat of chocolate paste and sugarpaste on both cakes and when you go to assemble the cake you should find that they fit together with only a small gap, if any. Place your chosen hardboard in the centre of the cake and, using a sharp, pointed knife cut a line around the board, cutting deeper down at the higher end, so that you can then cut straight in with the knife from the shorter side and remove the wedge.  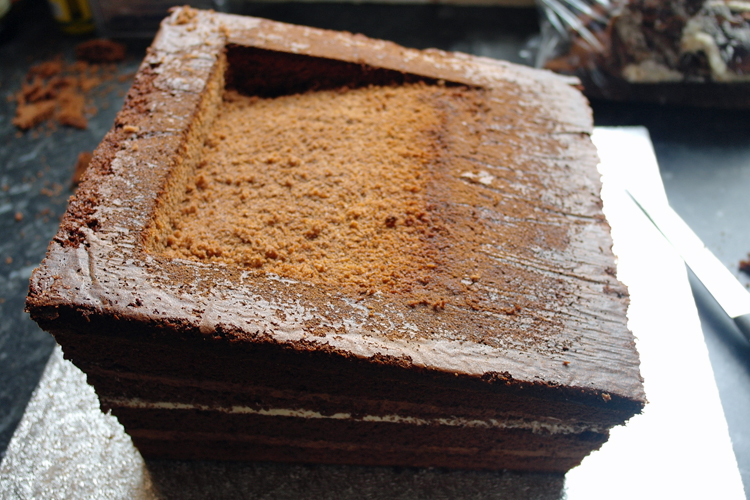 Coat the entire cake with a thin coat of buttercream/ganache. Carving the middle tier (7”) The method for this is exactly the same as for the bottom tier only you use the 6” hardboard as a guide for trimming the sides – and leave the cake sitting on the 6” hardboard for covering. The guide board for trimming the wedge out of the top is the 4” size. Carving the top tier (4”) Cut both 4” cakes exactly in half and assemble as you would a normal cake (the top is not sliced at an angle). Invert the cake as before and use the 3” cake card as a guide for trimming the sides. Buttercream as before. All 3 tiers, carved and buttercreamed: 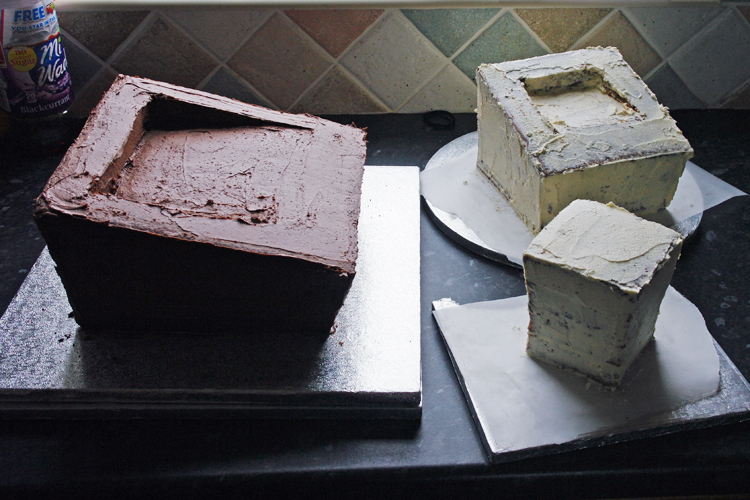 Coat each of the cakes with a layer of chocolate or almond paste, easing the paste gently into the recesses in the middle and bottom tiers as you lay it over the cake. Start draping the paste from the lower end and it will fall naturally into the hole, allowing you to smooth it in with a right-angled smoother. Leave for several hours or overnight before sugarpasting.
Finish the cakes with a layer of sugarpaste then dowel the iced cakes – 5 dowels in the bottom tier and 4 in the middle tier, pipe a blob of royal icing on top of each dowel and set the cakes in place whilst the sugarpaste is still soft. Each tier should fit snugly into the recess of the tier below – if there are any gaps the soft sugarpaste can be smoothed into place or they can be filled with a sausage of sugarpaste, smoothed in with dampened fingertip to blend in with the covering.
0 Comments
|
 RSS Feed